Scheduling Your Exam
This guide will focus on the process of scheduling an exam with Examity.
I have paid for an exam, but the exam was not scheduled.
You may have closed the payment portal before the transaction was fully processed. Reach out to support using our live support chat with your payment invoice available and they will be able to assist you.
I can’t find my exam on the exams dashboard.
All exams are displayed on the exams dashboard for any courses/programs you are enrolled in and that are available for scheduling. If you do not see a card for an exam you think you should have access to, contact your instructor or program to make sure you are properly enrolled.
I want to schedule an appointment for a particular time, but that time is not available.
When you are scheduling all available time slots are shown in the calendar. If a date or time is not available then the time slot has been filled or is blocked. If you require a specific time and that time is not available please contact your instructor or program.
What do I do if I need my exam proctored in a language other than English?
Examity can offer proctoring in a few other languages. If you need proctoring in another language please contact your school or program.
I missed my appointment, what do I do?
If the exam allows multiple attempts then you will need to schedule your exam appointment again.
I have to schedule my exam again, what do I do?
Log back in and check your exams dashboard. If you see the exam you are free to schedule it again. If the exam is not on your dashboard then you may need to contact your instructor or program to authorize another attempt. If your exam still has the status of “In progress” you will need to wait until the exam is finished processing before you can schedule a new appointment.
Automatic System Check
When you first arrive we will perform a basic system check, this is to ensure your device has everything it needs to be able to take an exam with Examity.

The system check will automatically cycle through a short checklist of required items, if all icons turn green then you are ready to test! if any of the required items are not found you will not be able to take an exam, though you can still schedule or interact with your profile.
Selecting an Exam to Schedule
In this example we are showing two exams, the first has already been scheduled and is ready to be taken. If you need to see your Exams rules or any accommodations you may have click the “View Exam Rules” link inside the exams card.
* If you do not see your exam card you may not yet be enrolled. Enrollment can take up to 24 hours. If you believe something has gone wrong please reach out to your exam provider.
In this example we will click the “Schedule Exam” button to begin scheduling Pop Quiz 2.
Scheduling An Exam
If your exam is an On-Demand or Auto exam you will not need to schedule and can take it at any time. For all other exams you will need to schedule. You can start scheduling by clicking on the “Schedule Exam” button within the Exam Card. This will open the scheduler Pop-up.
1. Click the “Schedule” button to open the scheduler pop-up.
2. Select the month, day, and time of your desired exam appointment.
3. Click the “Schedule Appointment” button within the pop-up to confirm your appointment.
4. If your exam requires payment you will be redirected to Examity’s payment portal. If not a pop-up will appear to confirm your exam. You should also receive an email confirming your appointment.
5. We suggest performing a system check to ensure your device is capable of taking an Exam with Examity. You can perform a system Check by clicking the “Perform System Check Now” button in the pop-up.
The Examity Payment Portal
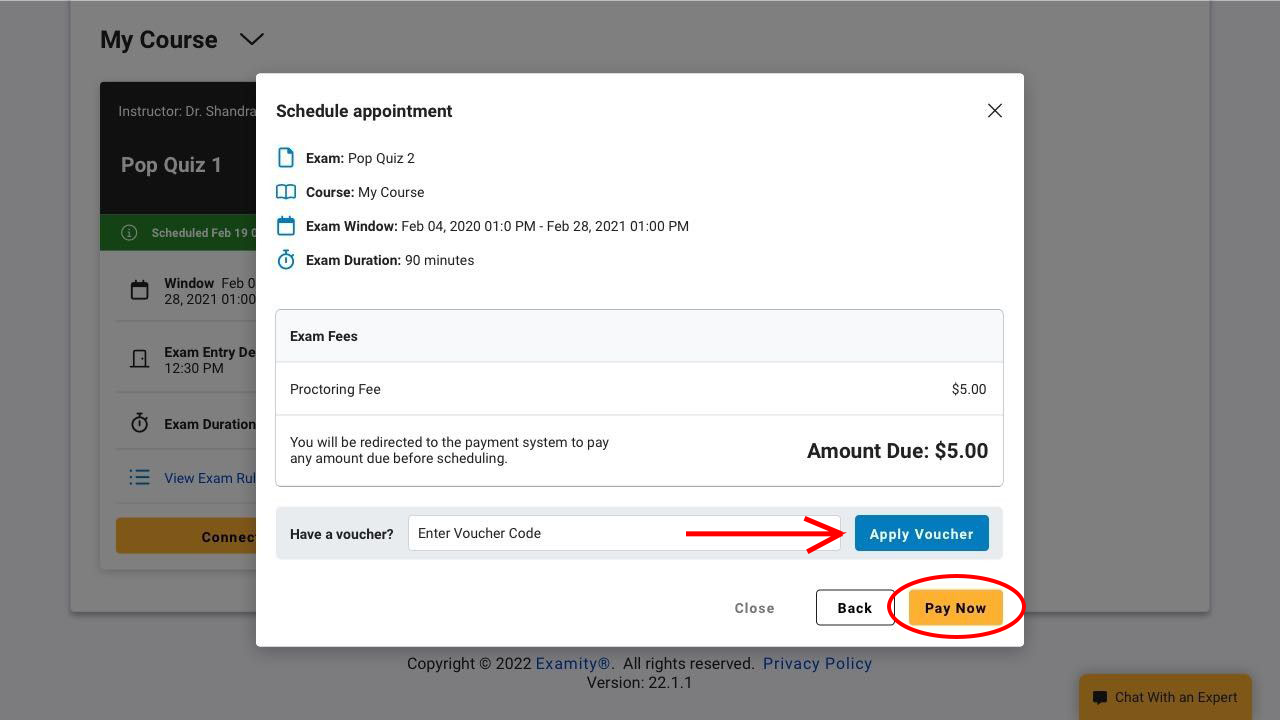
Some exams will require payment to be scheduled. You can pay from directly within the scheduling pop-up window. If you have a voucher code for your exam that can also be applied here.
1. After you have selected your date and time you will need to review the Exam fee.
2. If your Exam accepts vouchers you can add your voucher code at this time. After entering your code click “Apply Voucher”.
3. After reviewing the Exam fee click the “Pay Now” button to open the Examity payment portal.
4. Enter your card info into the payment portal.
5. Once you have filled out the payment form click “Submit” to submit your payment. It is important that you do not close this window until payment has been confirmed, doing so will interrupt the payment process.
* Do not close the payment window until your payment has been confirmed.
Rescheduling or Cancelling an Exam
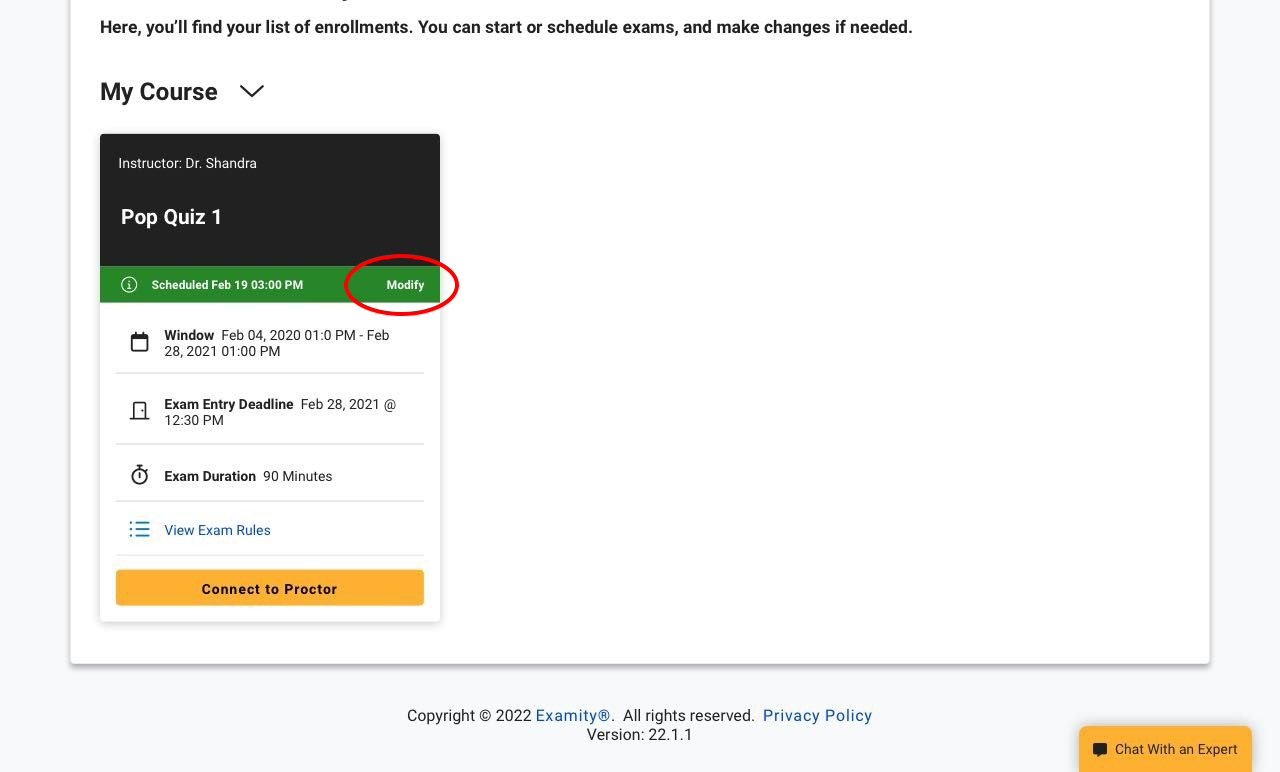
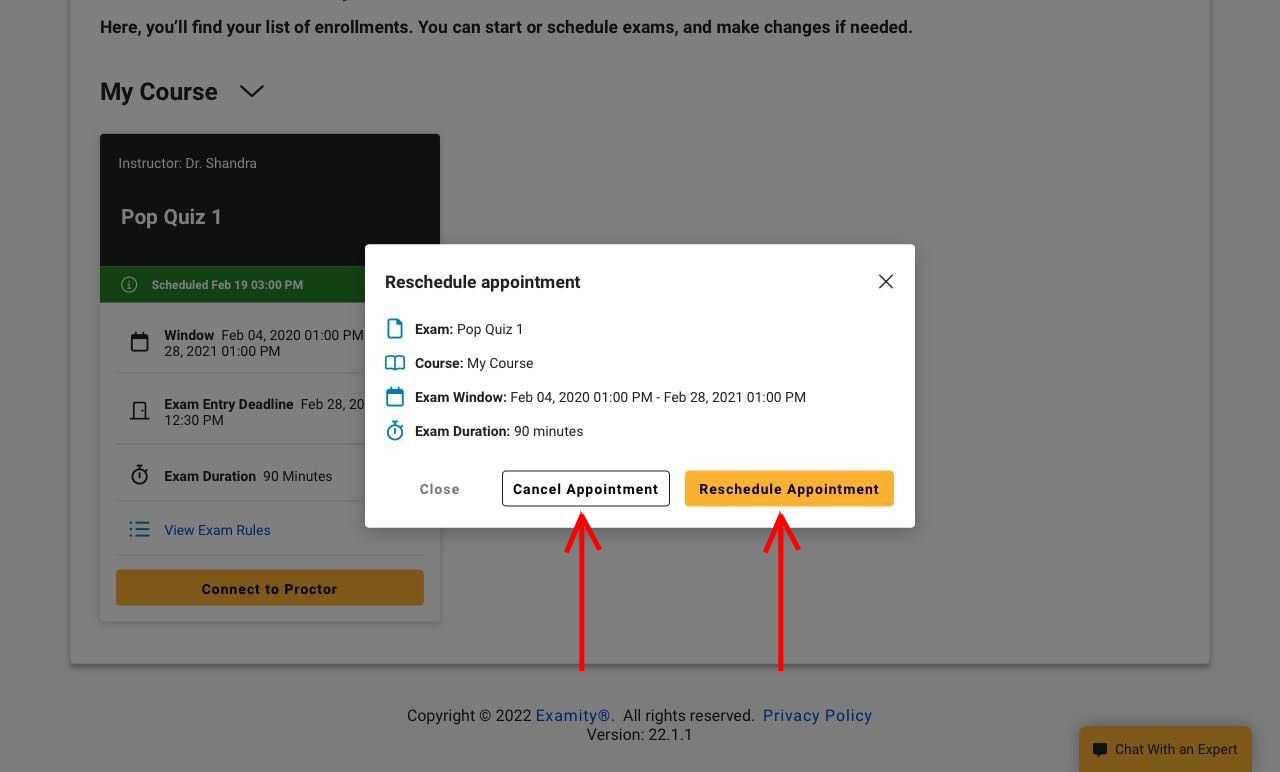
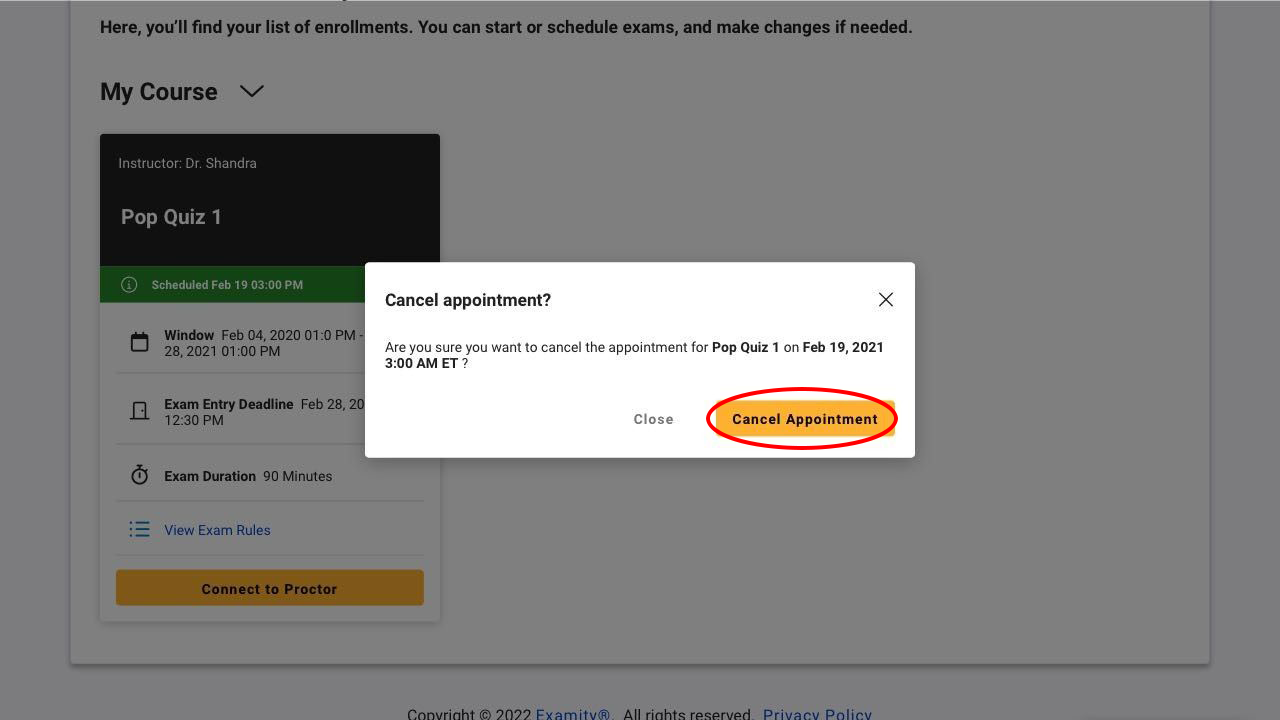
If you need to cancel or reschedule an exam you can do so from the exam dashboard using the “modify” link in the exam card. Some exams may incur a cancellation fee. In this example we will reschedule or cancel Pop Quiz 1.
1. Click the “Modify” link in the exam card.
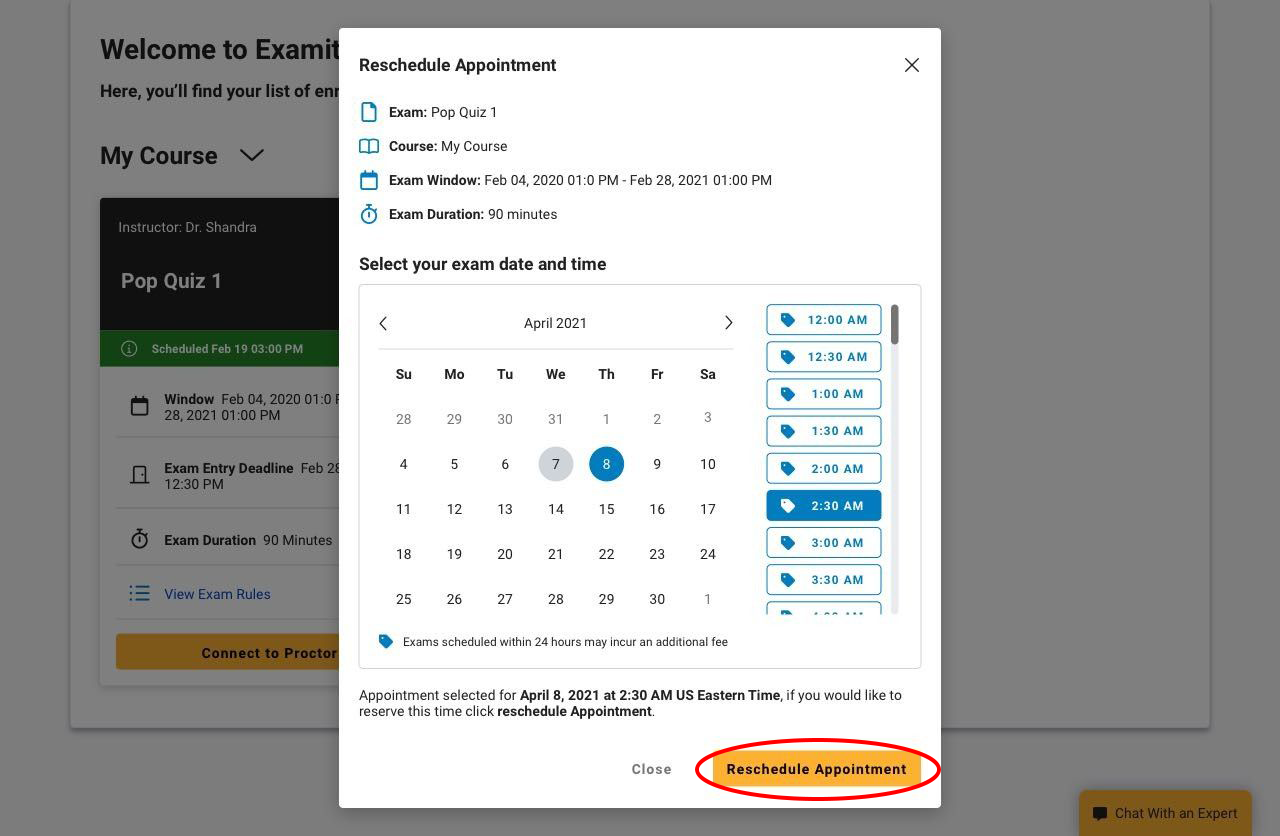
2. Select whether you wish to cancel or reschedule your appointment by clicking the “Cancel Appointment” or “Reschedule Appointment” button.
3. If you are rescheduling the process is the same as that shown in the Scheduling process above and you can continue as normal. The new appointment time and date will replace the one previously set.
4. If you are cancelling your appointment you will be asked for confirmation. Click the “Cancel Appointment” button to confirm your cancellation. You will be shown a pop-up confirming that you have cancelled your appointment.
5. You will receive an email confirming your new appointment time or the cancellation of your appointment.
